01
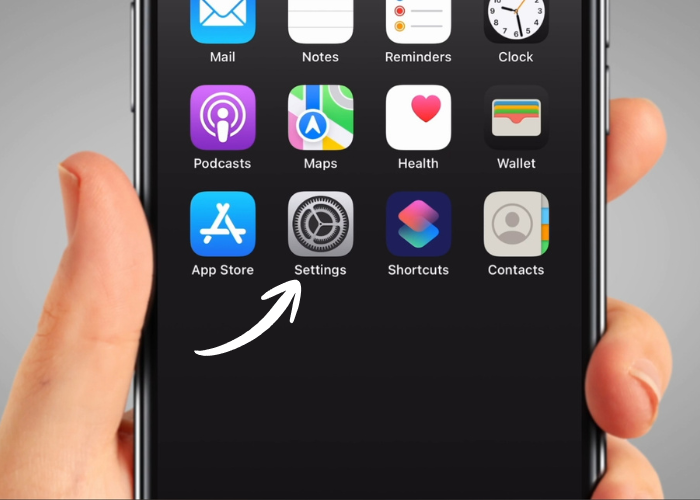
Find and tap on the ‘Settings’ icon. It is grey with a gear on it. You might need to swipe between screens to find it.
02
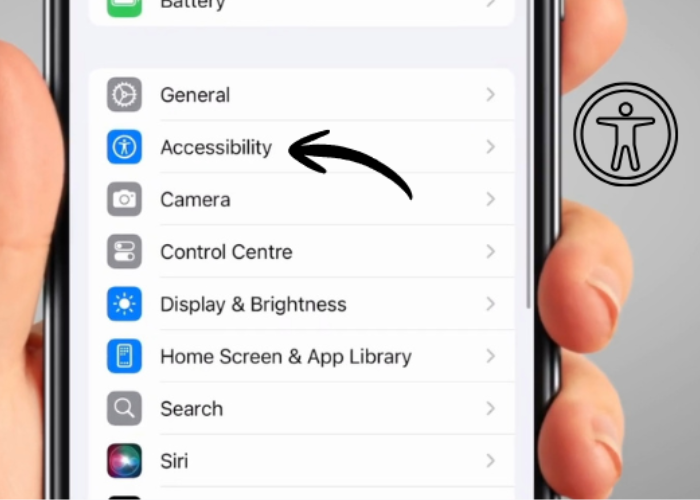
Scroll down to find ‘Accessibility’. It's blue and has a white stick man on it. Tap on it.
03
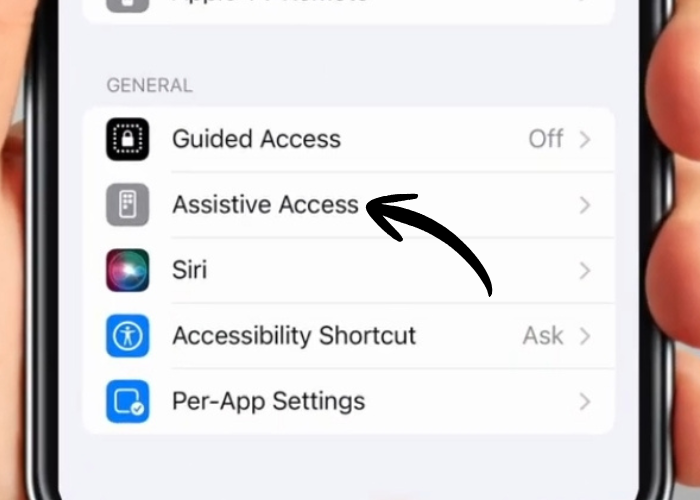
Now, scroll to the bottom and tap on 'Assistive Access'. It is under the 'General' heading and it has a white picture of a smartphone on a grey background.
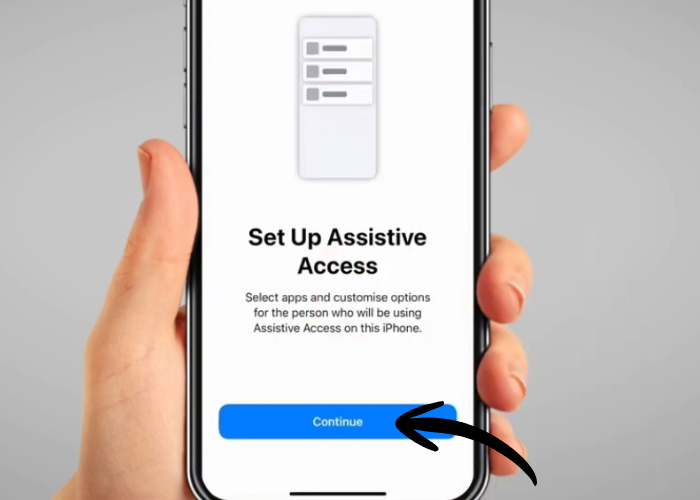
04
If it’s the first time setting it up, tap on 'Set up Assistive Access'.
06
Keep tapping ‘Continue’ until you reach the page called ‘Appearance’. Here, you can choose to display 'Assistive Access' using either a row or grid layout. This is only a visual preference. Then tap ‘Continue’ to proceed.
07
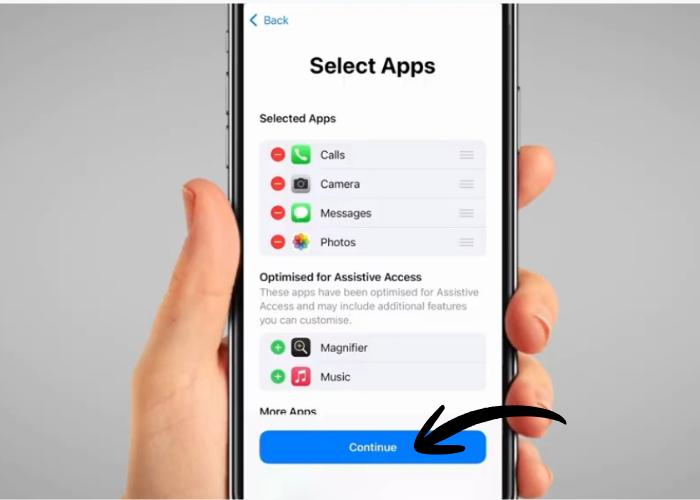
You can then select the apps you want to add to 'Assistive Access' by clicking the green '+' sign next to each one. You can add as many apps as you like. Each app will guide you through a few questions to complete the setup.
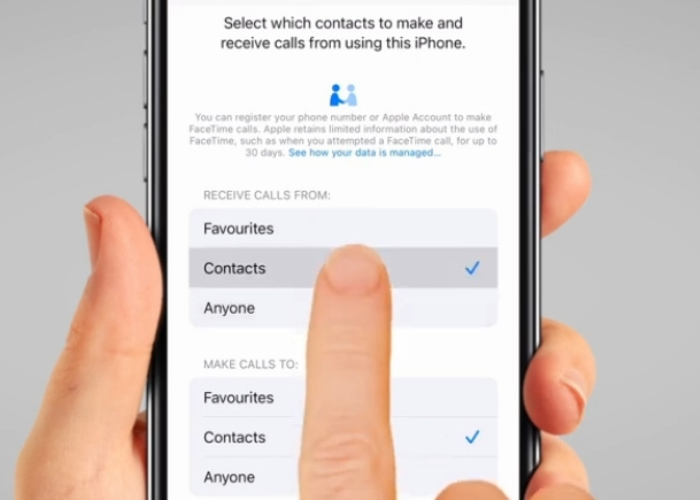
08
An example of this can be the Phone app. You can set it up so you do not receive any call or call anyone outside of your contact list. To do this, tap 'Contacts'.
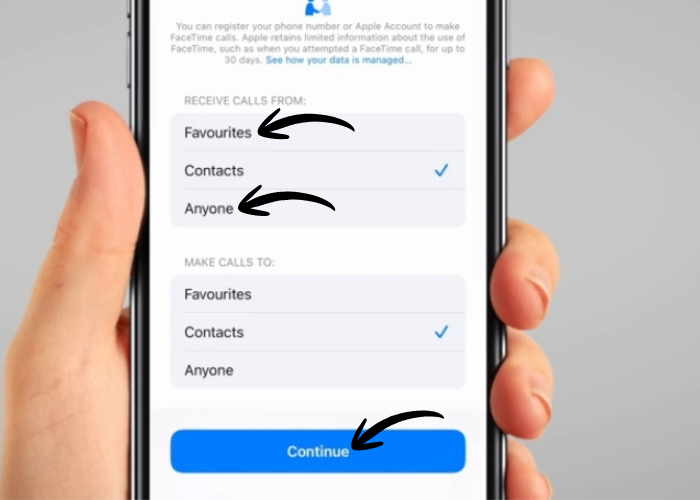
09
You can also choose to receive only calls from your ‘Favourites’ list or from ‘Anyone’. Use the same process below for when making calls. To proceed, tap 'Continue'.
10
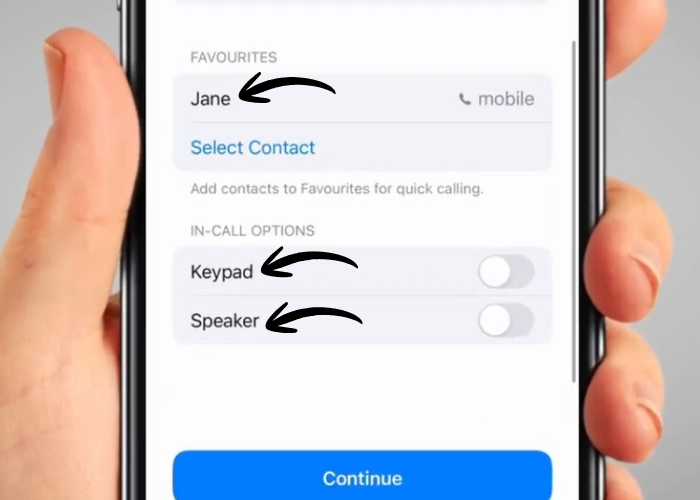
You can set up buttons to call specific contacts directly. You can also choose whether to display or hide the keypad and speaker buttons.
11
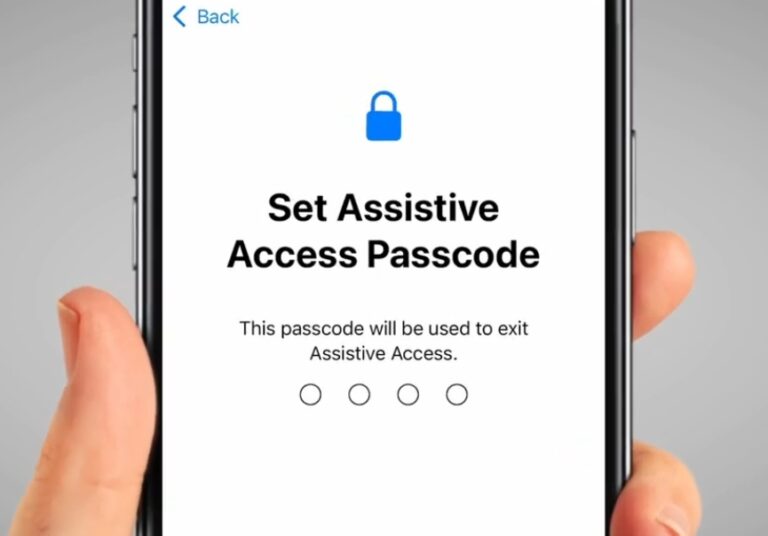
Once everything is set up, click on 'Continue' until you are asked to set a passcode.
12
This is important as the passcode you choose will let you turn 'Assistive Access' off again, so you can return to the normal iPhone interface. Make sure it's something only you or a trusted person knows.
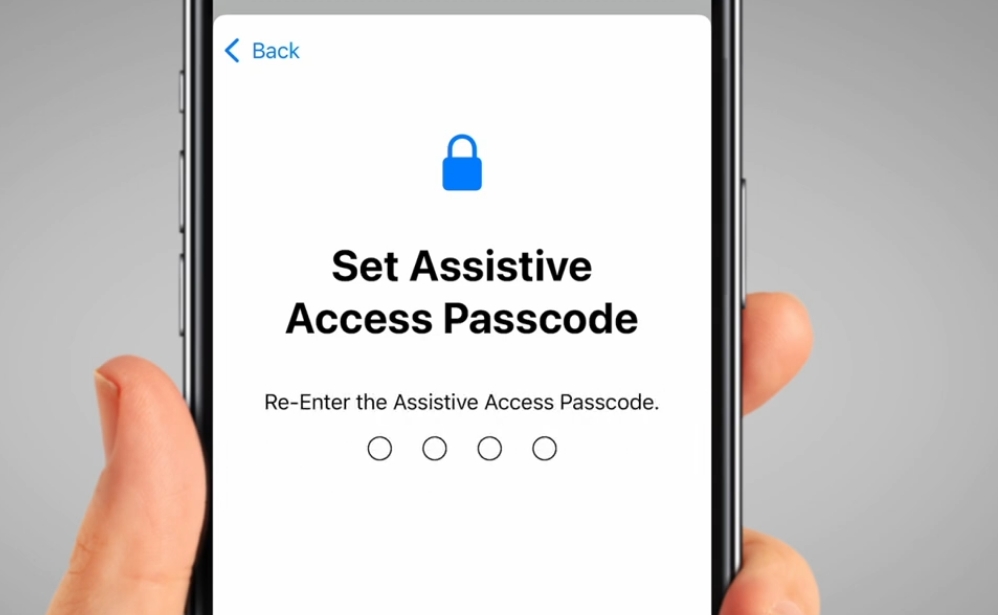
13
The phone will ask you to enter the passcode again to confirm it.
14
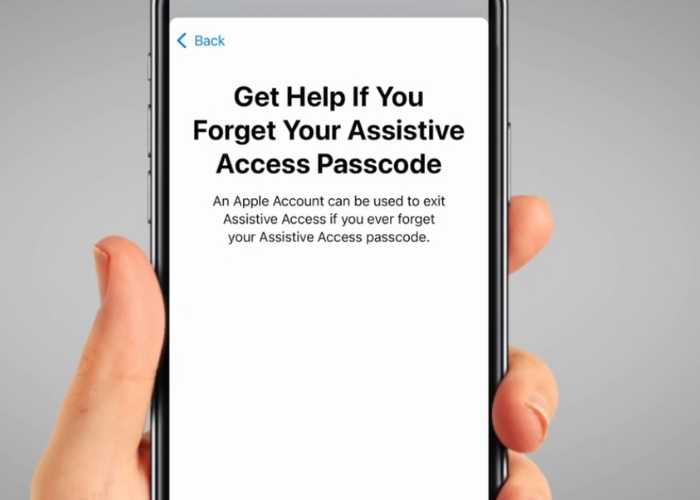
You can also choose to set up a recovery account, in case you forget your passcode. It should be the account of someone you know well, so you can contact them if this happens. They will need to sign in with their Apple ID to set this up.
15
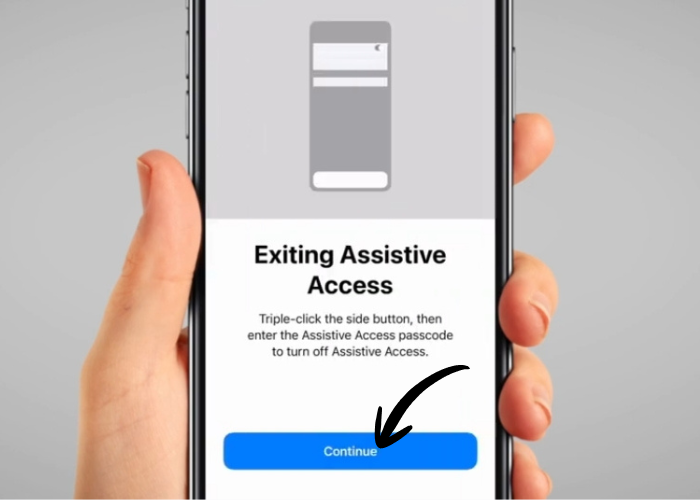
Your phone will also give you instructions on how to exit 'Assistive Access'. Make a note of this if you need. To proceed, tap 'Continue'.
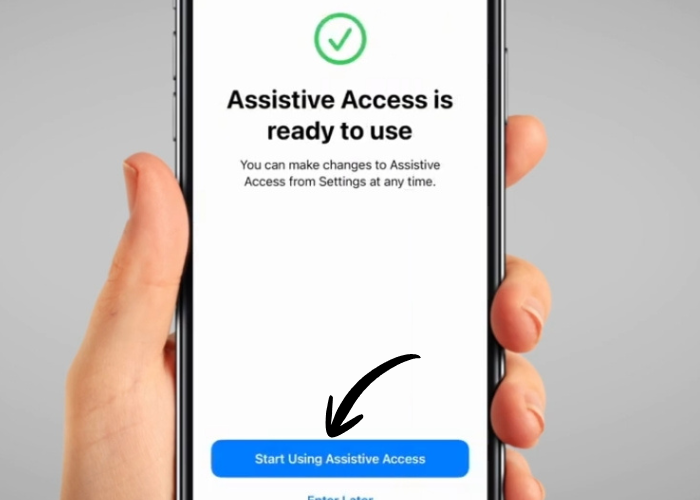
16
Once everything is set, tap on 'Start Using Assistive Access'.
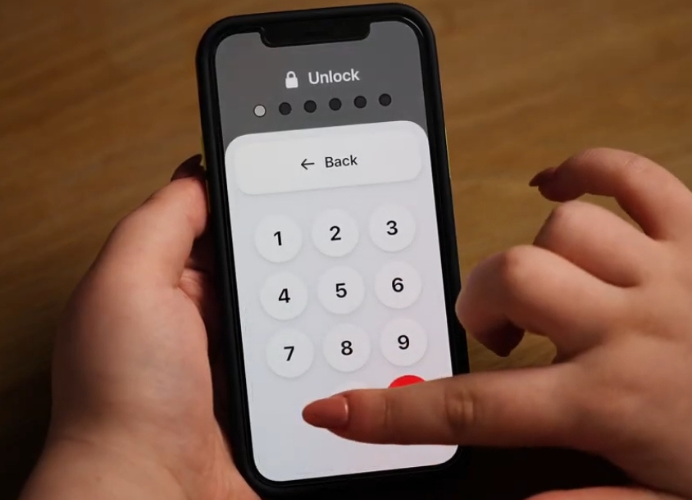
17
Your phone will now ask for your passcode and then go into the simplified layout.
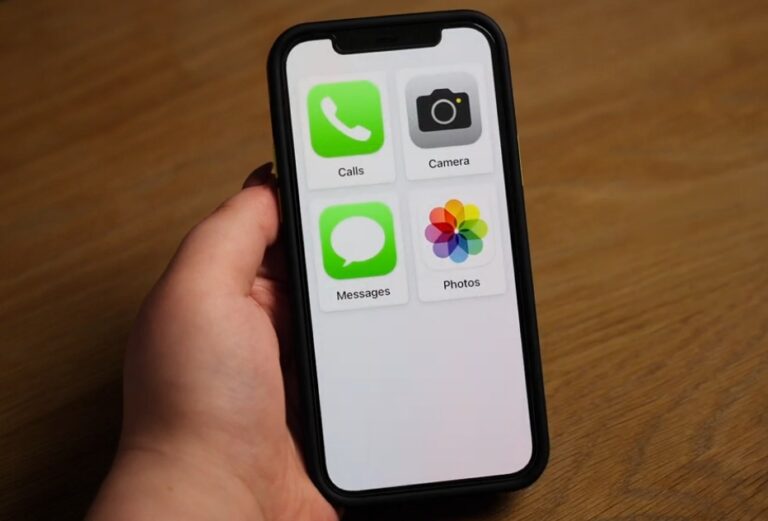
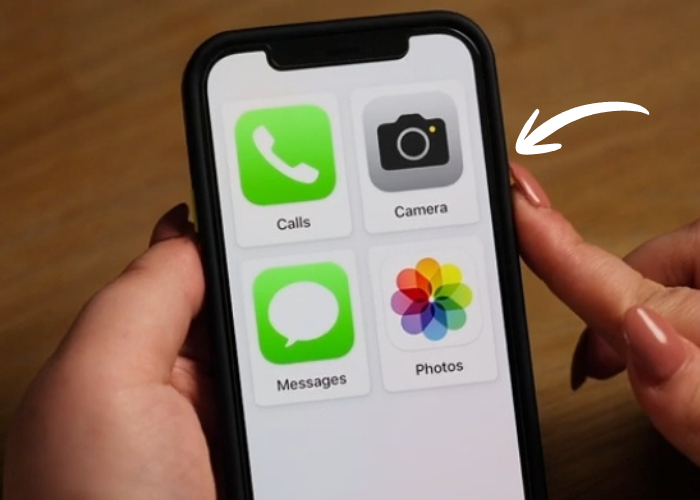
18
You will only see icons of the apps you chose previously with larger buttons, no swipe gestures and no distractions. If you set an accessibility shortcut before, you will not be able to use it while in 'Assistive Access'.
19
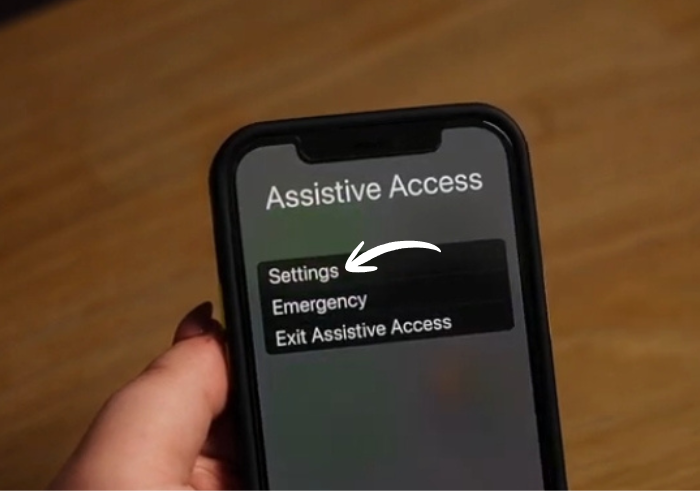
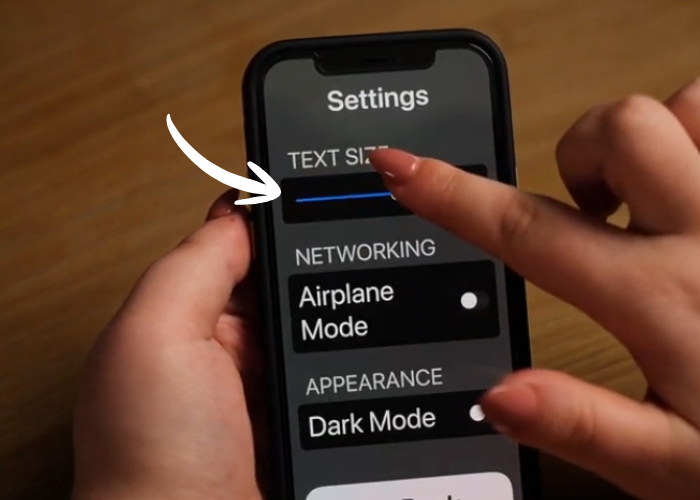
You can adjust the font size while in 'Assistive Access' by pressing the phone’s side button 3 times.
22
Then, use slider on top, where it says 'Text Size' to adjust the font. Slide it to the right to make the text larger.
23
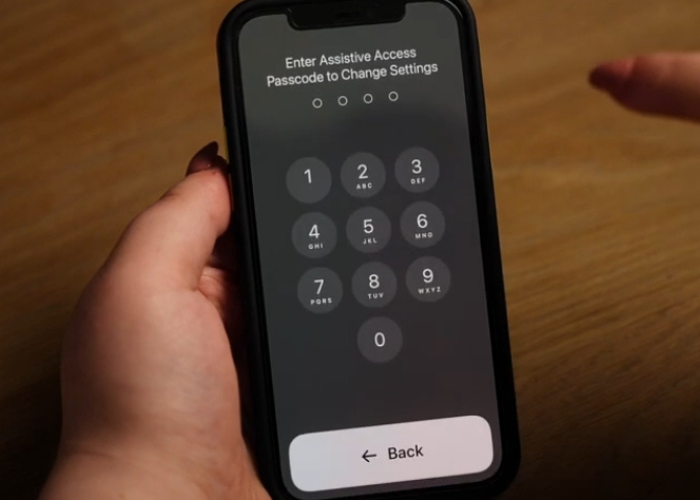
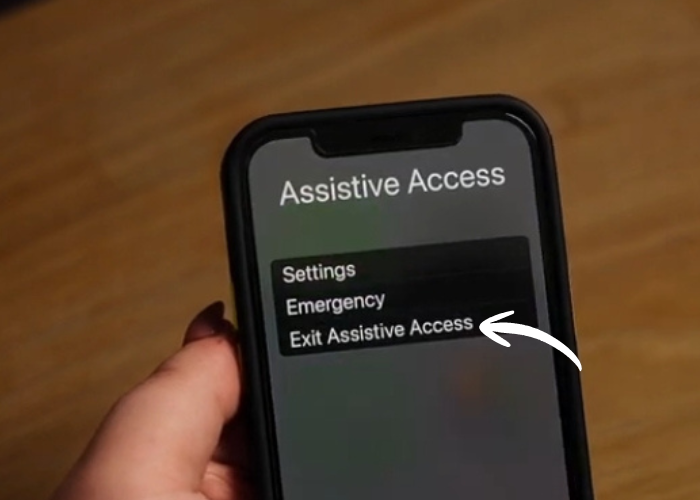
To exit 'Assistive Access', press the phone’s side button 3 times.
24
Then, tap on 'Exit Assistive Access'.
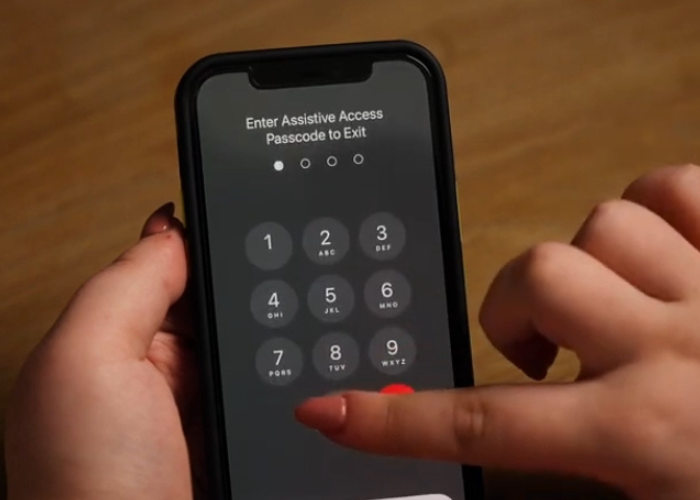
25
Insert your passcode again and wait for the phone to go back to normal.
26
If you're setting up 'Assistive Access' for someone else, make sure you have their full consent and explain the feature to them before making any changes to their phone.


 Charley, with a background in teaching, has worked in both educational and community settings, specialising in helping older adults build confidence with technology. Her work has given her a real understanding of the challenges people face when learning new skills later in life, and she enjoys finding simple, practical ways to make technology feel less daunting.